
When should I use this?
Use this article if you need to:
- Set up review groups so reviewers only see the submissions assigned to them
- Have all reviewers review all submissions
- Give each reviewer their own unique group
- Edit, rename, or delete an existing review group
Navigating to Review Groups
- From the Admin Dashboard, select the program you want to manage review groups for.
- From the Program Navigation Menu, click Reviews. This opens a page with two tabs: Reviewers and Review Groups.
- Click the Review Groups tab.
All Reviewers Reviewing ALL Submissions
-
On the Review Group tab, click the three little dots beside group ALL
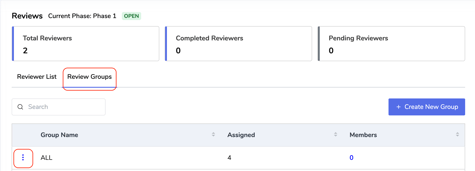
-
Click Manage Group
-
Select all the reviewers you want to assign to the All group
- Click Update Group
Each Reviewer Has Their Own Unique Review Group
- Navigate to the Review Group tab, click Create New Group
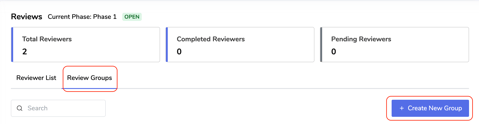
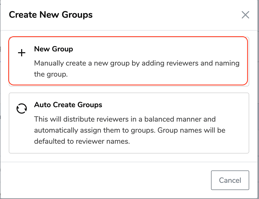
- Select Auto Create Groups
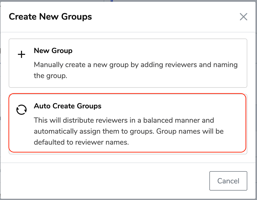
- Select the reviewers you want to create unique review groups for.
- Click Create Groups. The system creates a separate group for each selected reviewer, with the group name defaulted to the reviewer's name.
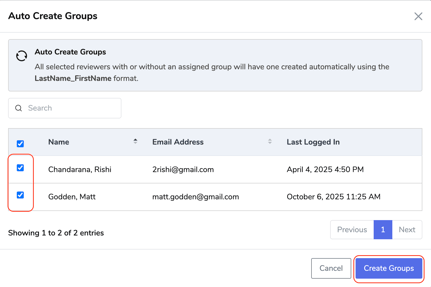
- You'll see under the Review Group column that a unique group was created for each reviewer.
Reviewers Will be Apart of a Specific Review Group
- Navigate to the Review Group tab
- Click the Create New Group button
- Click New Group. This will allow you to manually create a new group
- Enter the Group Name
- Select all the reviewers you want to be apart of this group
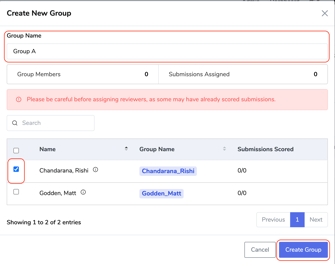
- Click Create Group
Managing Existing Review Groups
Editing a Group's Members
- On the Review Groups tab, click the three little dots beside the group you want to update
- Click Manage Group
- Add or remove reviewers as needed
- Click Upgrade Group
Note: If you're adding a reviewer who has already scored submissions in this group, you'll see a notification before the update completes.
Renaming a Group
- On the Review Groups tab, click the three dots beside the group you want to rename.
- Click Manage Group
- Update the Group Name and click Save
Deleting a Group
- On the Review Groups tab, click the three dots beside the group you want to rename.
- Click Delete Group
Note: A group can only be deleted if it has no members. Remove all reviewers from the group first (via Manage Group) if you need to delete it.
Related Articles
View this instructional video for a step-by-step guide: